
By Shala Hainer
Does the thought of trying to make your own holiday wreath have you tied up in knots? You’re not alone. Even the craftiest people often shy away from wreaths because it’s difficult to find creative ideas that elevate your front door from cheery but boring to something worthy of “Christmas Vacation.”
If you’ve never made a wreath before, they are easier than you think. Many non-traditional wreath ideas are nearly impossible to get wrong because it’s all about what you love.
Wrapped in Yarn
Although this option is the simplest, it offers the most opportunity for quick and easy variety. Apply a small amount of spray adhesive to a foam wreath form, then start wrapping the form with yarn, pulling it tight as you go around the form.
Space the yarn out slightly as you go around, spraying adhesive periodically. It takes about three times around the wreath for it to be fully covered, and when you’re ready to end it, simply cut the yarn and glue the end to the back of the wreath.
For added punch, hot glue some colorful pieces to one small section, such as non-breakable ornaments, felt flowers or holiday bows. To jazz up the wreath even more, try using a variegated yarn that will spread different colors around the wreath, or add something fragrant such as short juniper branches or cinnamon sticks as glued-on decorations. You can even criss-cross one layer of a different color on the top to completely change the look.
Yarn isn’t the hardiest of materials, so it works best on a covered porch or indoors.
Yarn Ball Wreath
Although this uses yarn again, it offers a completely different look. It gives a rustic, crafty twist to a more traditional look. Start by wrapping a foam wreath form with cloth, gluing it to the back or securing it with pins. Then use small foam balls of different sizes, or even wad up some newspaper into balls.
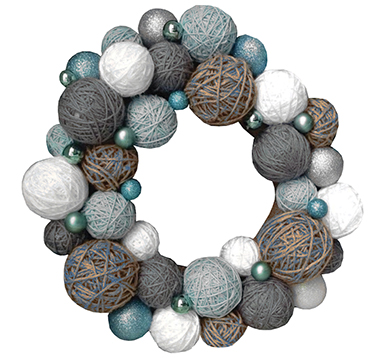
Wrap the balls in yarn, going over them at least four times to cover them completely. Glue the balls to the front, outside and inside of the form – hot glue works well for this. Then start gluing more yarn balls to those already attached to provide depth and dimension.
Get creative with the colors you choose – don’t stick to traditional red and green. Think purple and silver, blue and white, or a colorful mixture. Throw in some twine-wrapped balls to add that more rustic touch. Finish this wreath with battery-powered lights.
Wine Corks
If you’ve been wondering what to do with all the wine corks you’ve been saving, a holiday wreath is your answer. Several options exist, depending on how many wine corks you have available.
For a simple wreath with a few corks, use hot glue to secure some end-to-end inside a large embroidery hoop. On the outside of the hoop, stand the corks up and glue them securely so they fan out and give the wreath size and shape. Adding a holiday bow dresses up the wreath to match your décor.
Another option is to glue the corks somewhat haphazardly to cover a foam wreath form. For any corks that have ends pointing forward when you’re finished, pin a small snowflake or glue a colored dot of paper for little pops of surprise.
If haphazard isn’t your thing, you can glue them end-to-end, laying flat, in circles on the form, or cut the ends at a slight angle, and glue them with the angled end down so the uncut ends point outward. This last option could take 200 corks or more.
With any of these ideas, hot glue small decorations between the corks or evenly spread around the wreath. Berry bunches or small ornaments tend to fit nicely.
Mason Jar Lid Wreath
Walk on the wild side a bit and try a wreath that isn’t round. This one makes an adorable tree shape that dresses up your front door.
Take 15 mason jar lids, and lay them on your table in a triangle shape – there should be five lids on the bottom row, four on the second, and so on. Hot glue the lids together, using clothes pins to hold them in place until they dry. If you don’t want to use glue, tie the lids together tightly with twine.

Now for the fun part – tie decorations at the top of each lid, so they will hang down inside each circle. These could be small ornaments, large beads, pinecones, yarn balls or characters such as snowmen and elves. Twine works well with the look of the lids, or try fishing line so the decorations seem almost suspended in mid-air inside the lid loops.
Each of these wreaths should take a couple of hours to make. To make memories at the same time you make the wreaths, invite friends or family over for a relaxing craft time, or even a special girl’s night out. With a touch of creativity, you can make something you can show off proudly during the holidays for years to come.